With the maturity of domestic 10,000-watt fiber laser technology, 10,000-watt fiber laser cutting equipment has gradually become popular in the domestic market, providing a better solution for thick plate cutting. However, many equipment manufacturers are not very familiar with the configuration and operation of the 10,000-watt ultra-high-power fiber laser cutting machine. For this reason, the senior cutting application engineers of Maxphotonics have organized the relevant content and shared it with everyone.
The main introduction is the selection, installation, maintenance, and precautions of the 10,000-watt cutting head:
1. Model selection of 10,000-watt cutting head
Lens ratio: The recommended ratio of the collimated focus lens is 100/200 or the adjustable ratio zoom head (the coverage of the thickness in the 10,000-watt fiber laser cutting plate is wide, and the focus adjustment range is wide).
Connector model: At present, the mainstream of 10,000-watt fiber laser output heads are Q + and QD, which should be consistent with the choice of cutting head. The Maxphotonics 10,000-watt fiber laser output heads are all Q + models.
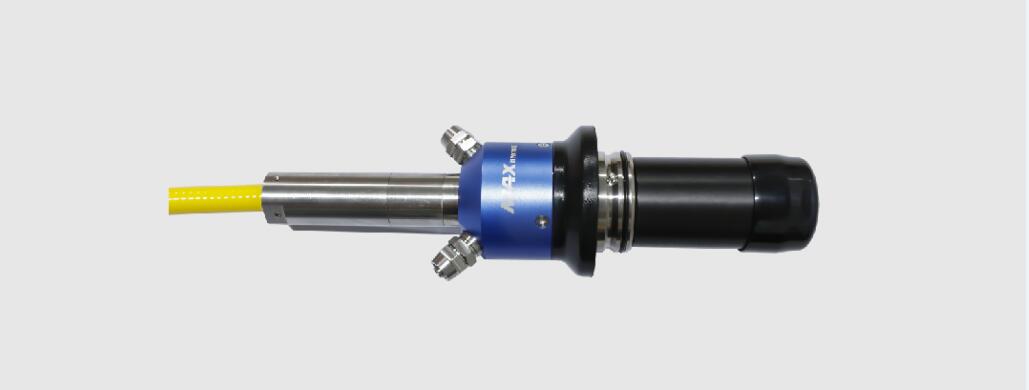

Maxphotonics 10,000-watt fiber laser output head
2. Installation and maintenance of 10,000-watt cutting head
Installation environment and requirements
Environmental requirements: Cleanroom or clean bench above class 1000
Tool: More than 100 times microscope
Auxiliary accessories: Anhydrous alcohol or IPA, cotton swabs, dust-free cloth, masking tape, complete set of hexagon socket, screwdriver, utility knife.
Other requirements:
1. Before installing the 10,000-watt fiber laser output head into the cutting head, make sure that the internal cavity and lens of the cutting head are clean and the crystal and periphery of the laser output head are clean.
2. The installation of the 10,000-watt fiber laser output head into the cutting head and the inspection of cleanliness must be carried out in a dust-free environment of more than class 1,000, and use a microscope that is more than 100 times.
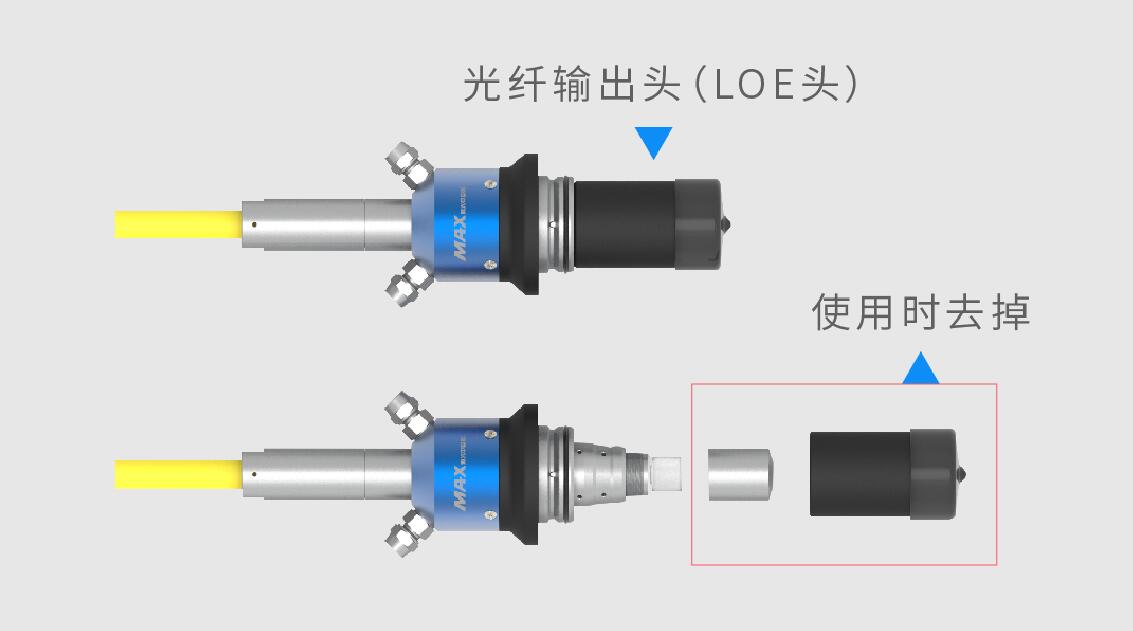
Installation process:
1. Make sure the inside of the cutting head is clean;
2. Remove the metal protective sleeve of the laser output head;
3. Fix the laser output head laterally and aim it at the microscope;
4. Clean the periphery of the laser output head;
5. Remove the crystal protection ring of the laser output head;
6. Adjust the microscope so that the crystal end face is visible;
7. Examine the entire crystal end surface, and when it is found to be dirty, wipe it clean with a cotton swab dipped in absolute alcohol;
8. After ensuring that the crystal of the laser output head is clean, insert the output head laterally into the cutting head;
9. Tighten the cutting head and seal the joint with adhesive tape;
10. Install the cutting head to the cutting machine, move at high speed, and check whether there is dust on the lens through the red beam of the laser;
11. Make sure that the cutting head is clean before installing laser cutting.

LOE output head(Removed when used)
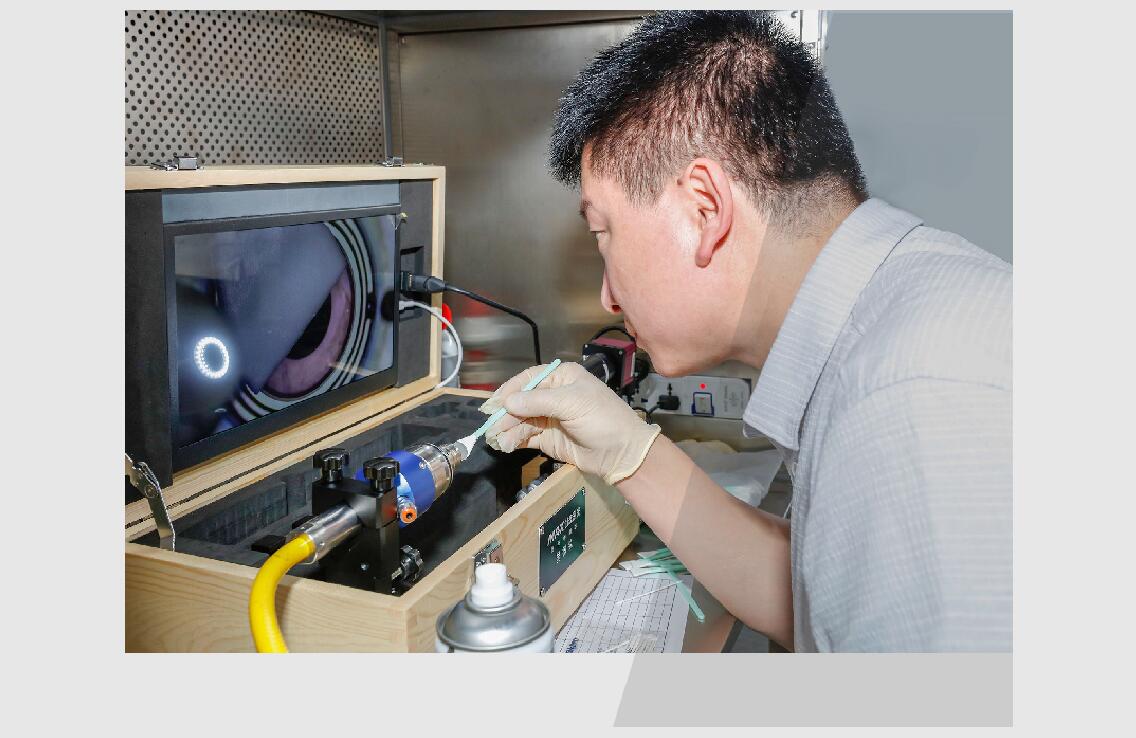

Maintenance:
1. Before using the cutting head, it is recommended to wrap a layer of tape around the cutting head (use the tape with no residue removed) to avoid the dust in the gap from entering the cutting head during later maintenance
2. Once the internal lens of the 10,000-watt cutting head is dirty or damaged, it is recommended to use a replacement method, and it is not recommended to take it out for cleaning, avoid secondary and more serious pollution;
3. Only the replacement of the nether protective lens of the 10,000-watt cutting head can be operated on the cutting machine. The replacement of the upper protective lens and the collimating focus lens must be carried out in a dust-free environment of more than class 1000;
4. To check the lens of the 10,000-watt cutting head, first, use white paper to check whether the red beam of the 10,000-watt fiber laser has black spots, then output the laser at low power, use black photosensitive paper to check whether the beam spot has a stain, and finally take out the lens and check under the microscope.
3. Test process of the 10,000-watt cutting head
1. Whether the follow-up calibration is normal;
2. Whether the focus adjustment is consistent with the monitoring actual focus;
3. Whether the actual zero focus is at ±1mm focus position;
4. Whether the plates cutting effect of different thickness and different materials are normal;
5. Whether the temperature of the lens and the cutting head is stable for a long time, whether there is the thermal lens in the lens, and whether the cutting effect is consistent.
4. Cooling of the 10,000-watt cutting head
Cooling configuration: The diameter of the water pipe from the water cooler to the cutting head must be greater than the diameter of the cutting head water cooling interface (φ8mm), the water flow rate is ≥ 4L/min, and the water temperature is 28~30 ℃.
Water flow direction: High-temperature water output of water cooler → Output head of 10,000-watt fiber laser → Cavity of 10,000-watt cutting head → High-temperature water input of water cooler → Bottom cavity of 10,000-watt cutting head.
Cooling scheme: Since some companies have no cooling device in the bottom cavity of the cutting head, in order to ensure long-term stable processing, avoid the influence of excessively high cutting head temperature, it is recommended to install a water cooling module.
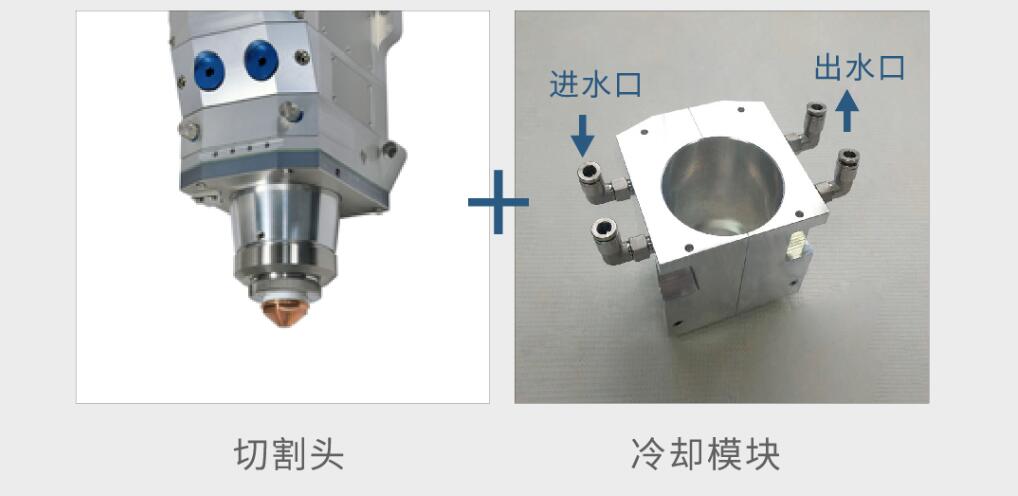
Left: Cutting head Right: Cooling module(Water inlet & Water outlet)


